
May 10, 2017: The Little Prince (Final Project)
All semester i have wanted to animate a story about The Little Prince, and I finally decided to do it. In order to make that possible I had to learn a bunch of stuff:
I found a 3D printable Little Prince model that I used to take hte mesh apart. I used the Little Prince's hair on all the characters that I made, but other than that the rest of the characters are original. Because The Little Prince was a single polymesh, I actually made new arms for him so that I could rig them (was not successful doing that with the polymesh).
- Modeling characters
- Rigging an existing character and the characters that I modeled
- Using mental ray to get a ~beautiful~ render
- I also figured out how to use Xgen to make great grass, but, my computer could not handle that and corrupted the file every time I tried to save after doing this.
I found a 3D printable Little Prince model that I used to take hte mesh apart. I used the Little Prince's hair on all the characters that I made, but other than that the rest of the characters are original. Because The Little Prince was a single polymesh, I actually made new arms for him so that I could rig them (was not successful doing that with the polymesh).
Storyboard:

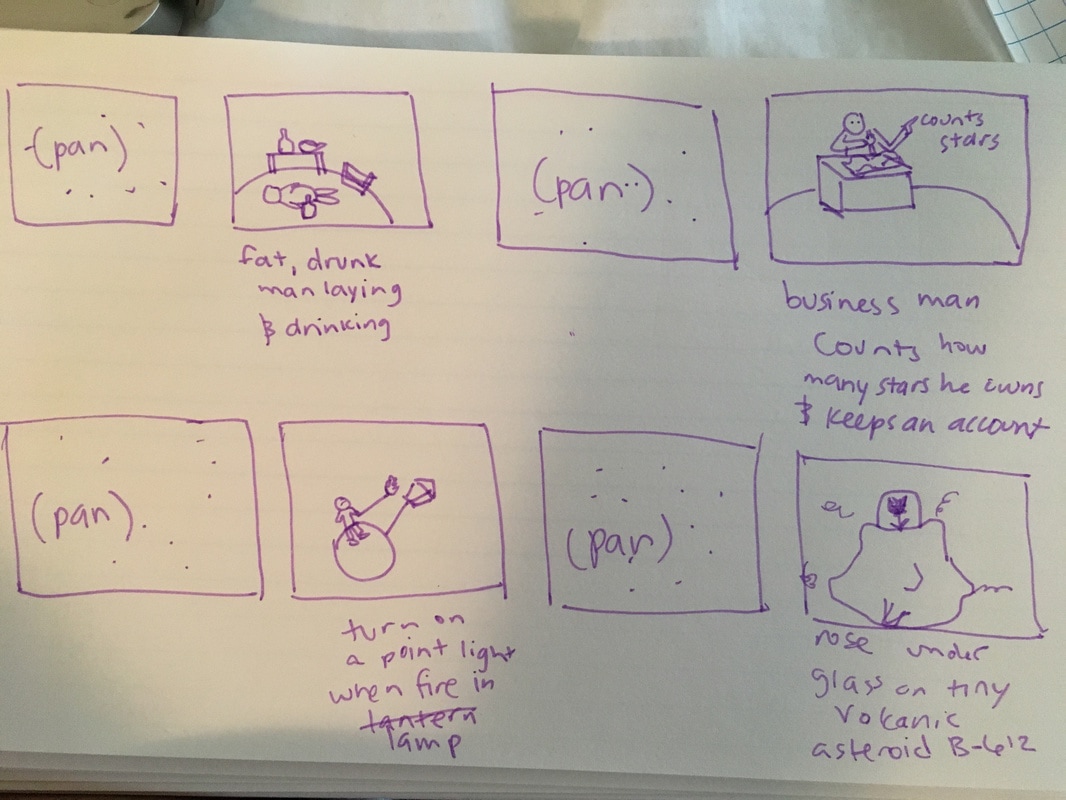
This animation probably won't make sense to anyone who has not read The Little Prince, but here is what you need to know. The Little Prince visits different asteroids and meets all sorts of people along the way.
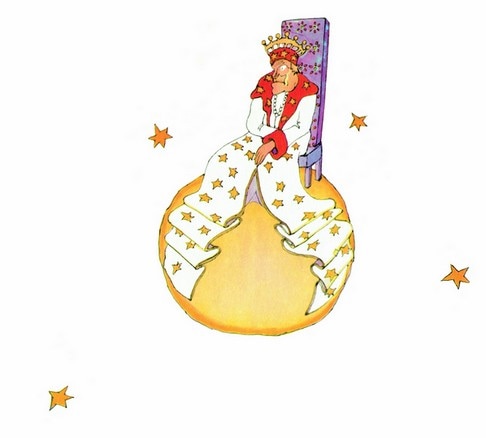
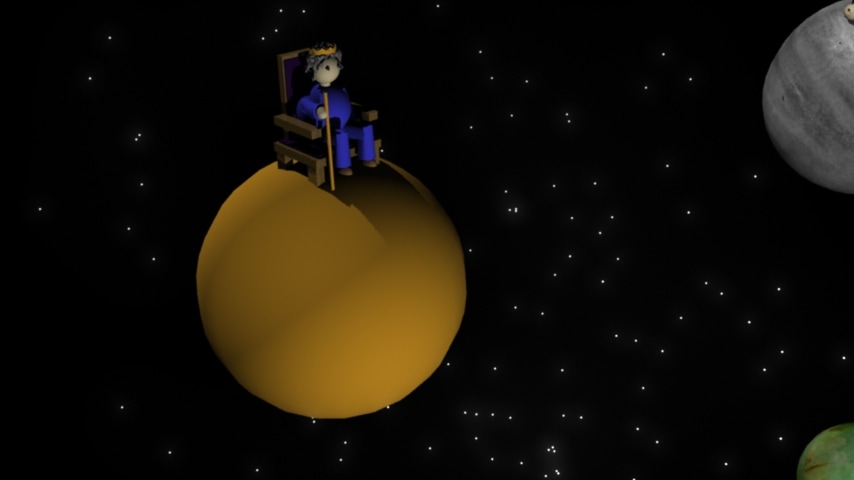
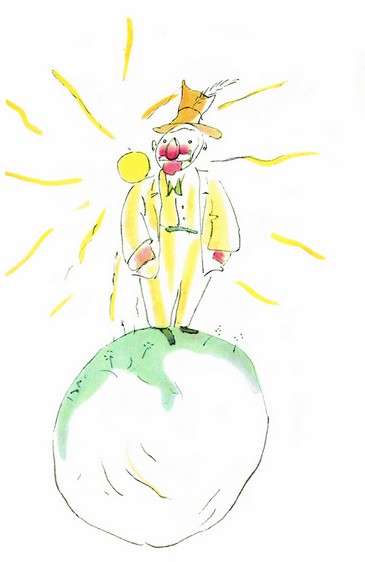
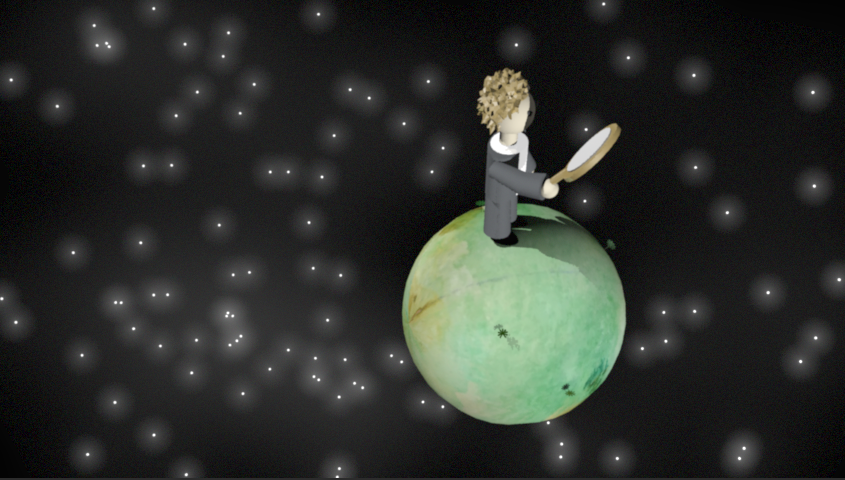
On Asteroid B-325, he meets a king who says he is all powerful and everyone obeys his orders. He can order the sun to rise and set. But, he only 'commands' the sun to rise at sunrise and set at sunset. For the following pairs of images, the left hand side shows the illustrations from The Little Prince, and the right hand side shows my Maya interpretation.
The reference images included were actually what I originally intended to use in my storyboard, though my angles ended up a little different in order to catch the light properly in the final render.
|
|
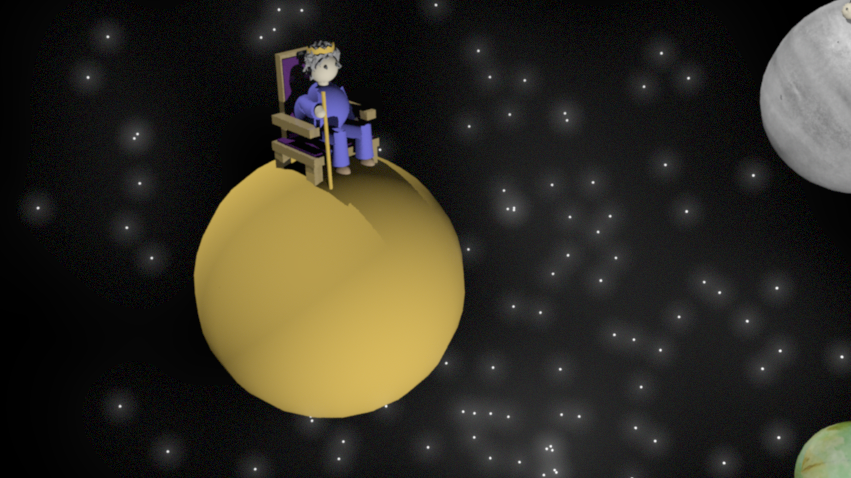
Also, the rendered viewport showed really pretty illumination around the stars, which I loved, so I'm going to use those pictures from here forward.
On asteroid B-326, The Little Prince met the conceited man. He thought he was the most intelligent and most handsome man ever, but he was the only one living on his tiny asteroid, so there was no one to compare himself to.
|
|
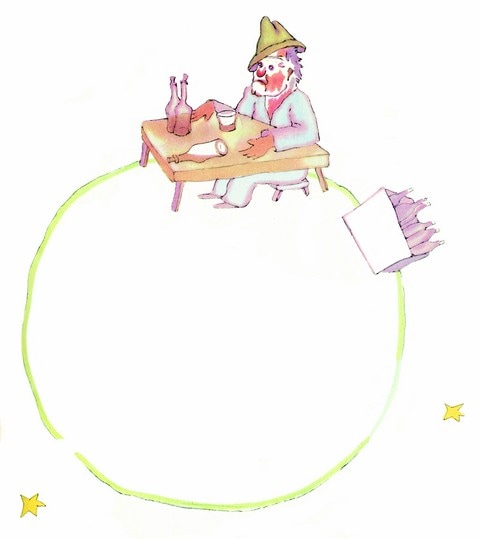
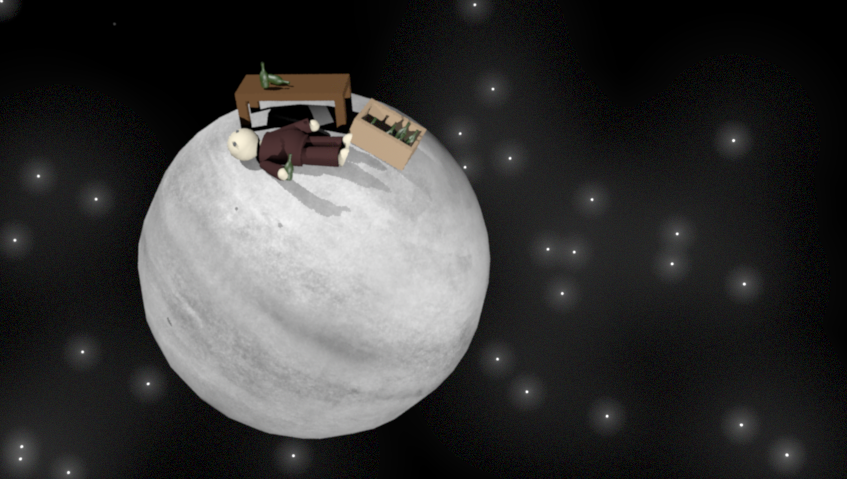
On Asteroid B-327, The Little Prince met a drunkard, who would drown his sorrows in alcohol.
|
|
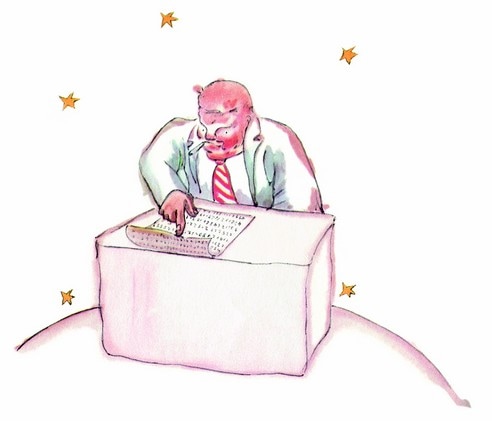
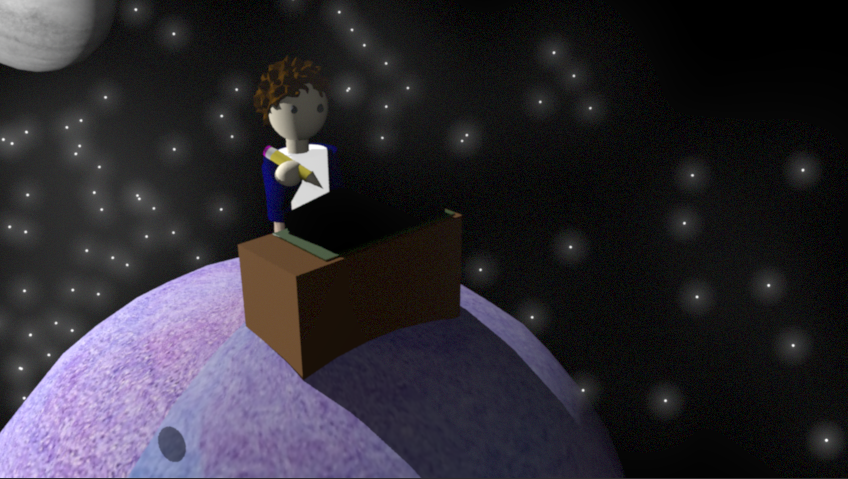
On Asteroid B-328, The Little Prince met a businessman, who was always so busy counting stars (which he claimed to own) and marking them down in his financial books, that he didn't even have time to light his own cigarette.
In the render preview, you can see a big thick open book in front of this character, but in the actual rendering output the book pages were covered by shadow.
In the render preview, you can see a big thick open book in front of this character, but in the actual rendering output the book pages were covered by shadow.
|
|
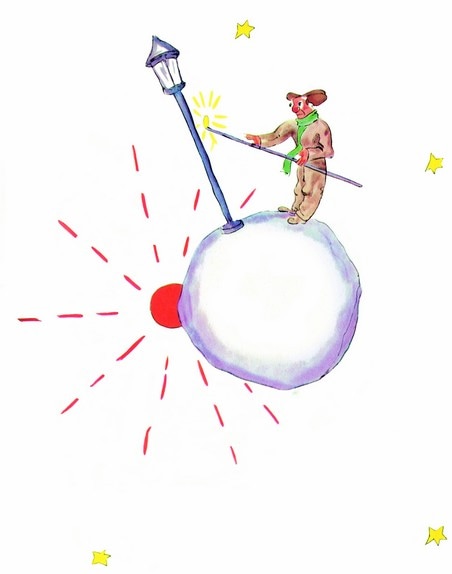
Then the Little Prince met his and my favorite character, the lamp lighter, on Asteroid B-329.
|

|
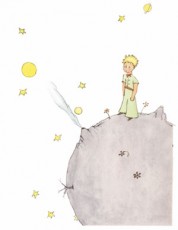
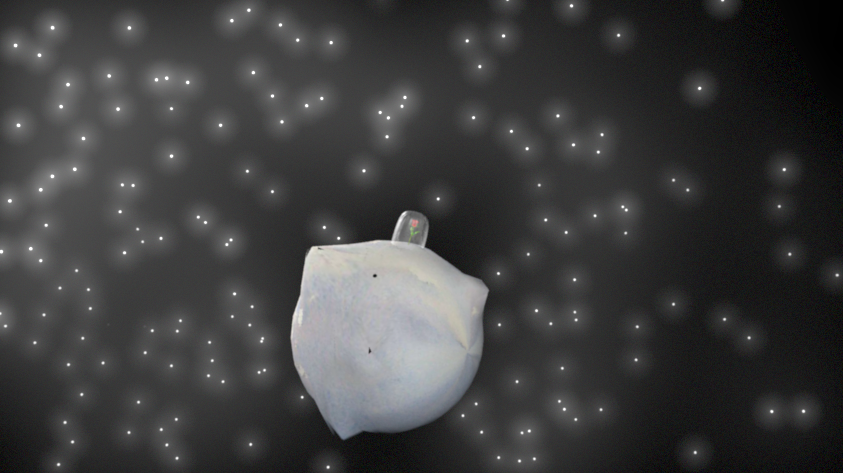
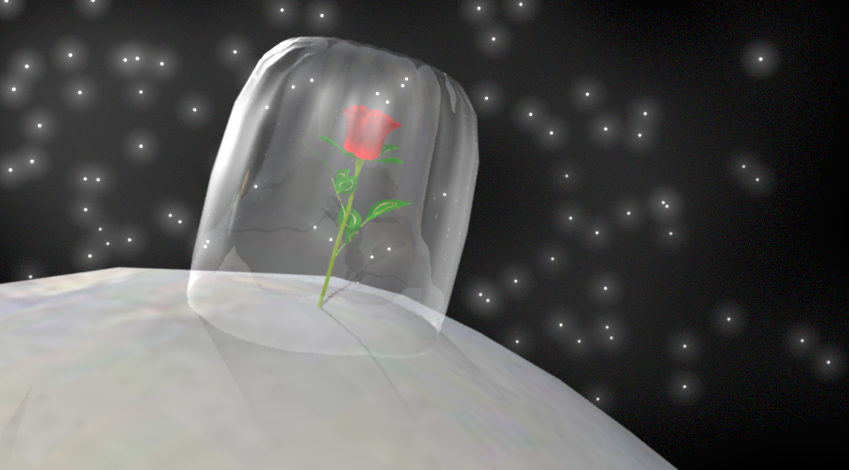
Last, the Little Prince visited a Geographer, but for purposes of this animation I liked the ending with the lamp lighter, and instead showcased the Little Prince's own Asteroid B-612, all covered in tiny volcanos, with his beloved rose waiting under the glass as he left her.
|
|
Here is a closeup:
This is the FULL animation, rendered using mental ray. Although I checked the key shots of each person on the asteroids to make sure they were well lit enough, it seems that adding a point light in front of the businessman, who counts stars and keeps accounts about how many he owns, was not enough in this rendering mode to illuminate that person's face. Also, the mirror cast a shadow onto the conceited man's face that is also much darker than what appeared in the rendering preview pane. This suggests to me that for future renders I should try batch rendering single frames for each key point rather than relying on the preview pane.
Sources:
I got The Little Prince model (modified here) which I used both as the Little Prince and for other characters' hair from http://www.yeggi.com/goto/mp_km3p3se7ioZ/m2aGbktbGw7Sqq/bx9pfi9u6YnfDu4tzu2uLXrnN02tvU1dDapaeZoMmko6HZnZ/gzceJsKm0zurw3Nv05N2R6NrLoebP5tjgqXLW5M/Yzs0=
I got the rose from https://www.turbosquid.com/FullPreview/Index.cfm/ID/777691
I got the tiny flowers on the conceited man's planet from https://www.turbosquid.com/FullPreview/Index.cfm/ID/618030
I modeled everything else myself.
These are the textures I used:
https://ih0.redbubble.net/image.172991143.5855/flat,1000x1000,075,f.u1.jpg
https://www.google.com/search?q=document&source=lnms&tbm=isch&sa=X&ved=0ahUKEwj9pv-n4eTTAhVS3mMKHUfqBxgQ_AUICigB&biw=1396&bih=646#tbm=isch&q=accounting+document&imgdii=tgKPcBaujxChzM:&imgrc=BZmZoo-gUphAAM:
https://image.freepik.com/free-vector/blue-and-purple-watercolor-background_1100-145.jpg
http://www.paintingwithwatercolors.com/wp-content/uploads/2012/01/Soft-grey-sky-with-watercolor-paints.jpg
I got the background music from The Little Prince soundtrack, "Escape" by Hans Zimmerman. https://www.youtube.com/watch?v=VhZ7vETPqbA
I got the 'thud' sound effect for the sunset king here: http://soundbible.com/605-Wood-Whack.html
April 27, 2017: Motion Capture
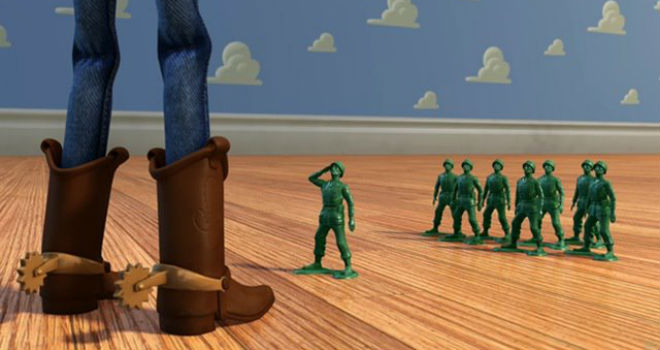
I made a soldier from Toy Story (except his legs aren't stuck to floor piece). I came up with the idea because after researching how I would go about making a 3D texture for this character (I was originally thinking I would make two of the hero character and make one look like Sam Winchester and the other like Dean Winchester from Supernatural, and have them knock down the door and barge into a creepy looking building checking for ghosts with their rock salt guns) I realized that was going to be really tough given the amount of time I had to do this. So instead I started thinking of situations in which the character would be all one solid color and the plastic army men came to mind. BOOM, toy story. I would've connected the legs but that kind of defeats the mocap data idea.
To clean up the original mocap1.data, I used a few techniques.
I also did lighting and render instead of playblast for the first time on this animation and I think it turned out pretty well. I used a single spotlight with a wide (80 degree) cone angle situated high in the northwest part of the movie, and some ambient light with a slight yellow tinge on the right hand side of the movie so shadows wouldn't be so dark.
I used a free LEGO model from online (https://free3d.com/3d-model/lego-brick-8x2-60034.html). I changed the colors, stacked, and grouped them to make them all move as a single piece, as stacked LEGOs do.
Here is the Toy Story picture I used for reference:
To clean up the original mocap1.data, I used a few techniques.
- Started by going joint by joint in the graph editor, and used curve > simplify curve with different tolerances on time and space to get the desired effect. This basically removed a lot of the excess keyframes that were making the character too jittery.
- Edited the arm movement by hand -- I think the original data had some problems keeping the arms separate as they repeatedly overlapped in the output file, so after removing a bunch of keyframes using #1, I manually adjusted the arms to not intersect with each other or the face.
I also did lighting and render instead of playblast for the first time on this animation and I think it turned out pretty well. I used a single spotlight with a wide (80 degree) cone angle situated high in the northwest part of the movie, and some ambient light with a slight yellow tinge on the right hand side of the movie so shadows wouldn't be so dark.
I used a free LEGO model from online (https://free3d.com/3d-model/lego-brick-8x2-60034.html). I changed the colors, stacked, and grouped them to make them all move as a single piece, as stacked LEGOs do.
Here is the Toy Story picture I used for reference:
I used wallpaper that we see inside Andy's house in the original Toy Story (http://wallpapersafari.com/w/PEiYBr/). I modeled the molding at the bottom. I used a basketball court floor texture for the hardwood floor (http://www.psdgraphics.com/textures/wooden-floor-texture/).
Here is my story board:
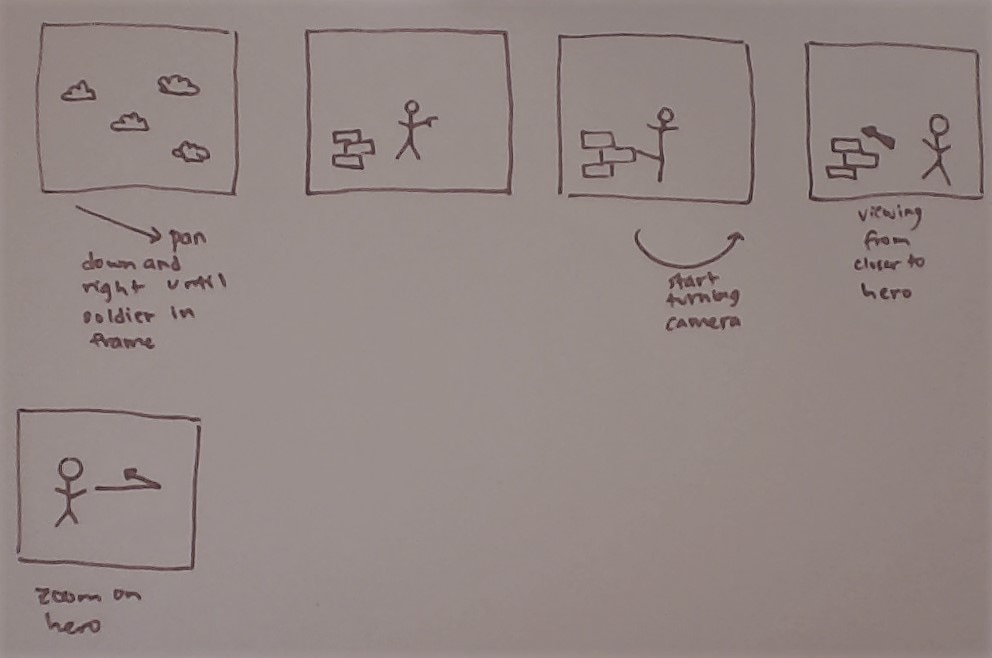
I actually did make the first part of this story board (the panning) but it isn't included in the final render. I had to add negative frames to the beginning to add time there so that I could make this pan happen. It works in playblast, but when I edited the render settings to include negative frames, it just never worked. So, that part is missing.
April 13, 2017: Rube Goldberg

I made an apple tree planting machine. An apple drops from the tree onto the seesaw, another apple flies into a hollow branch on the tree with a secret seed extracter inside. Meanwhile, the first apple knocks over some wooden planks arranged like dominos, which fall on a button that turns on a bulldozer. The bulldozer knocks away a wooden pole that is keeping a bucket of dirt from spilling, just after the seeds fall out from the tree.
My items are:
Tree that the apple falls from/that the other apple goes through when it travels through the hollow branch (like a pipe).
Seesaw (launches an apple into the tree)
Dominos (knocked over)
Bulldozer controller (button gets pressed)
Bucket on wooden pole (pole gets knocked out so that bucket can dump)
Tree that the apple falls from/that the other apple goes through when it travels through the hollow branch (like a pipe).
Seesaw (launches an apple into the tree)
Dominos (knocked over)
Bulldozer controller (button gets pressed)
Bucket on wooden pole (pole gets knocked out so that bucket can dump)


It was all dynamics except:
The bulldozer was on a motion path when it moved.
The bulldozer controller button and body were set as passive rigid bodies, and the button being 'pressed' happened by 2 key frames. This is because if I turned on gravity for an active rigid body (the button) so it would move when hit by the domino, it would have already falled down to the ground plane due to the gravity pulling it at the beginning of the simulation.
March 23, 2017: Bikes!
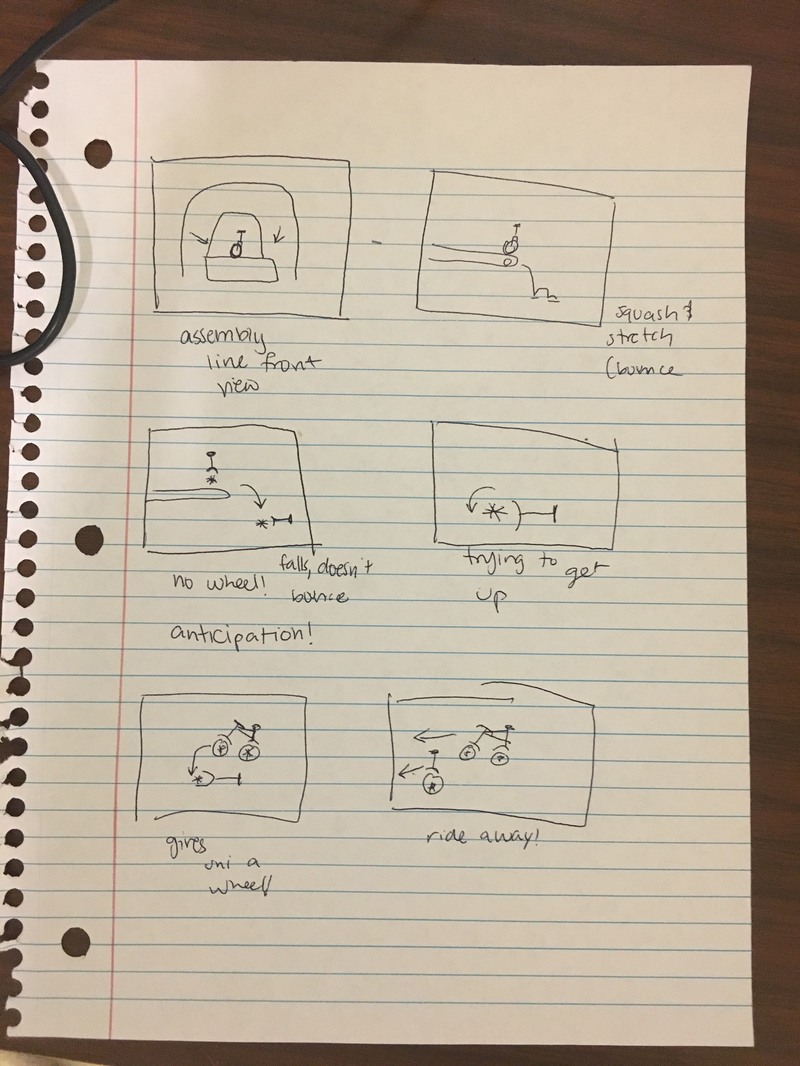
I used: squash and stretch, anticipation, and staging.
March 2, 2017: Bouncing Ball Animation
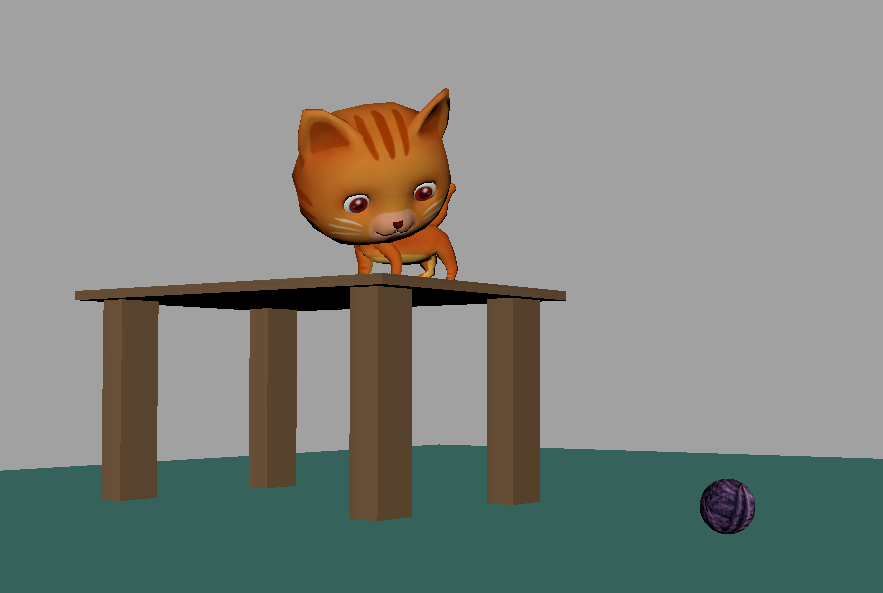
This is my cat, Finn. 10 months old and loves food & knocking things off of tables. He is my inspiration.

Storyboard: Just a cat doing cat things. Sometimes, cats see things sitting on a table and just have to get up there, touch it, sniff, and knock it onto the floor. Gravity experiments are an everyday thing for cats. Today, Finn is experimenting on a ball of yarn.


Disney Principles of Animation:
I used squash and stretch on the ball of yarn as it hits the ground and bounces back up. I made my main character very lovable and expressive with his ears and tail. I used follow through to animate the ears and tail as he jumps. There is anticipation - the audience sees him tap the ball and can guess he will knock it off the table next. I animated some of this pose to pose (i.e. the ball bounce) and other parts I did straight ahead (i.e. the cat nudging the ball with his nose). I also used arcs for his jump onto the table.
I also put a texture under my yarn image on the ball of yarn to make the surface appear more rough.
I got the model from Turbosquid. https://www.turbosquid.com/FullPreview/Index.cfm?ID=1008576&stgURLFragment=3d-models/cat-cartoon-3d-model/ The model came rigged and with a basic running animation. You can see that basic running at the beginning (I used it as the smaller leap). I used the leg animations from the running as a guideline when animating the big jump that the cat makes onto the table. Besides the first leap, I did all the other animations myself.
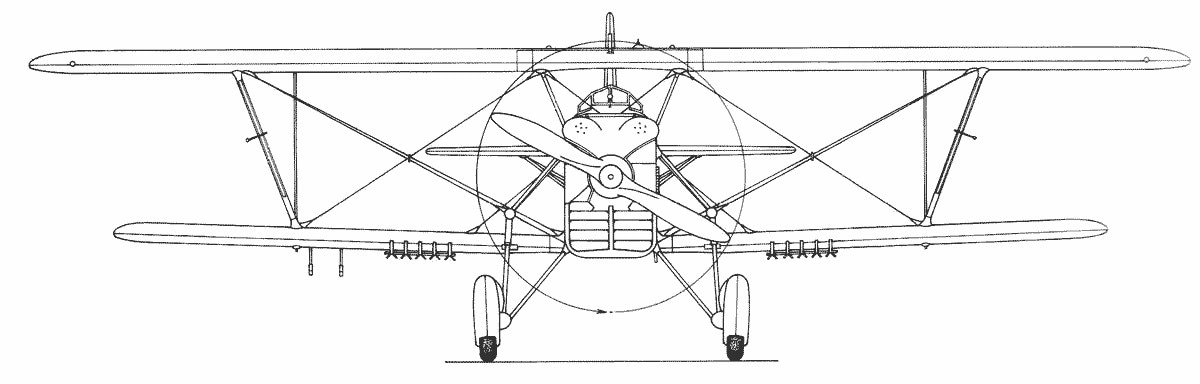
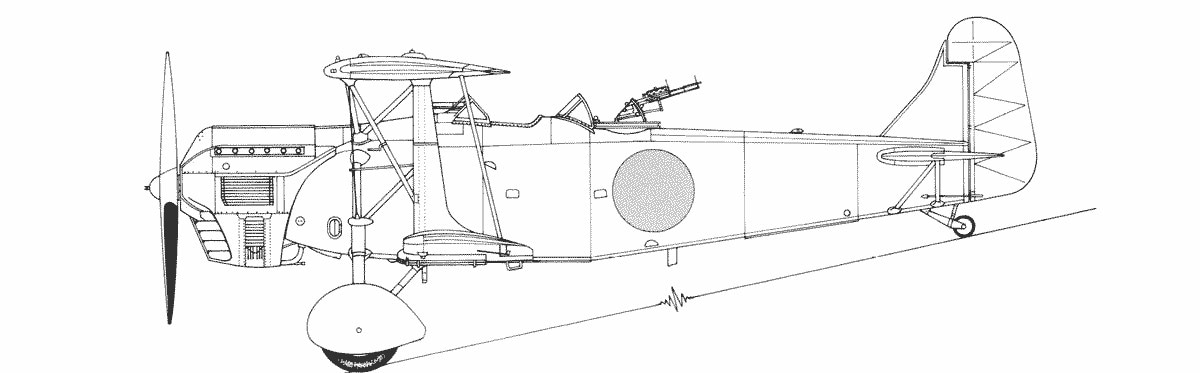
February 21, 2017: Plane model (updated)

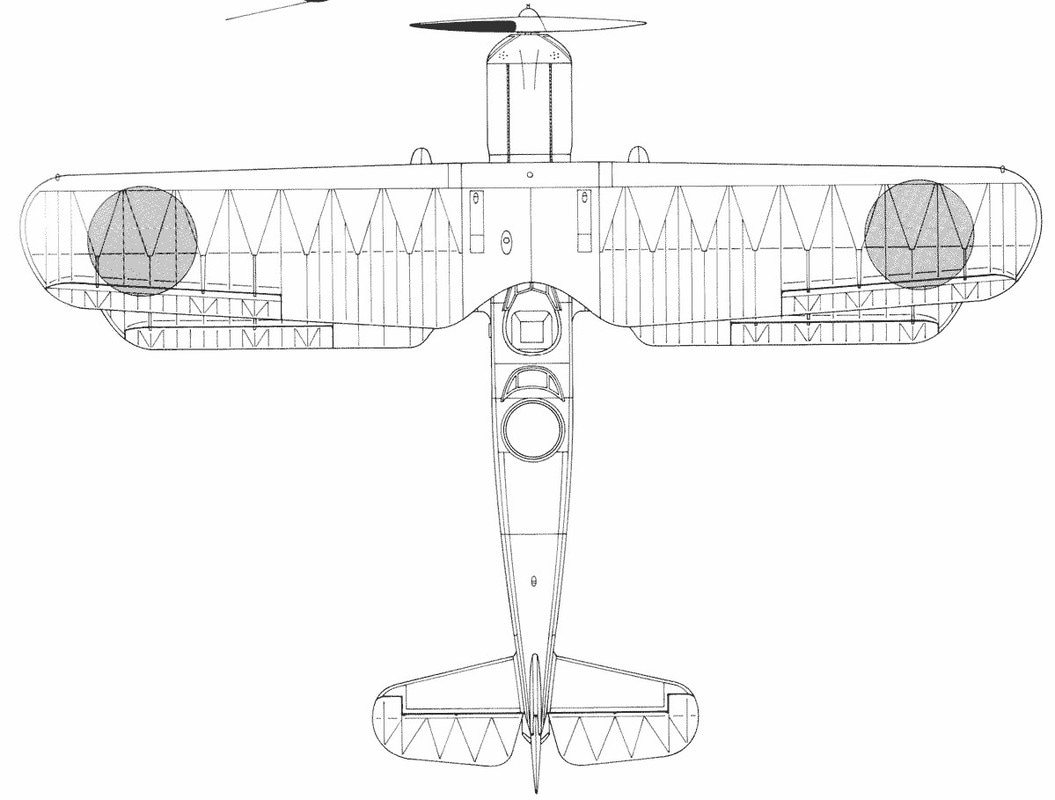
I decided to model a biplane, and used the Japanese Fighter, Kawasaki Ki-10-11 for inspiration. I looked at a few different images of Ki-__ to get ideas of how the plane looked from different angles and ultimately put some of my own spin on it, both in shapes and colors. I started by following the blueprints below.
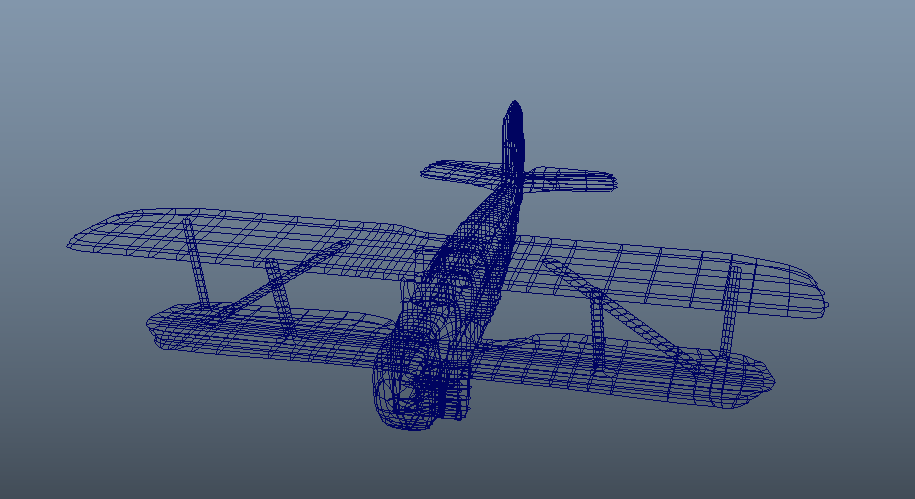
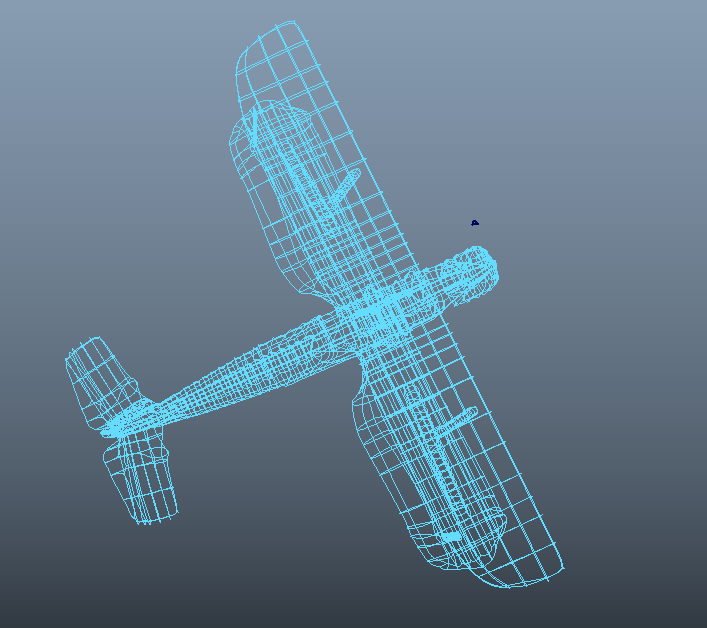
My model (wireframe)- click to enlarge.


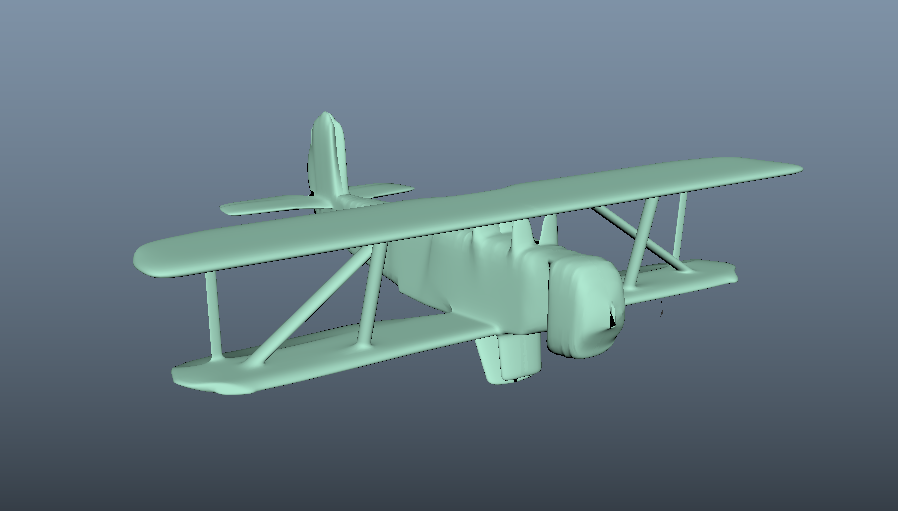
Shaded version (click to enlarge).


Below is the version I presented in class. The model had some holes in it that I managed to fix (as you see above) thanks to advice from the class. It turns out I was selecting edges when trying to use 'fill hole' when I should have been selecting vertices. I found that the vertices in this model were actually a little tangled, which is why I was having so much difficulty with the holes.
February 9, 2017: Planets Animation
Tutorial:
Modifications:
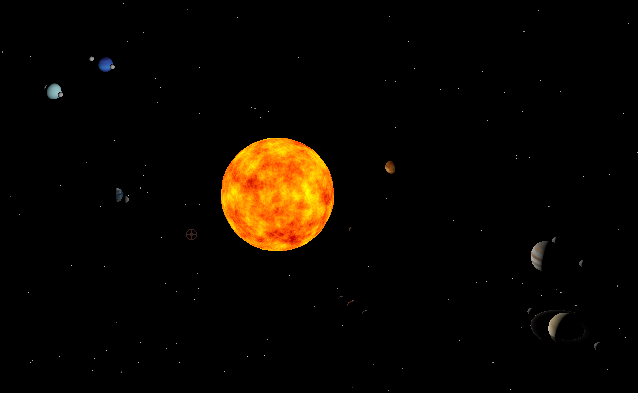
I added (1) textures to all the planets, (2) a phong shader to the sun, rotation to the sun, and a point light coming from the sun to appropriately light the planets and fix the shadows on the sun, (3) stars using a particle emitter, (4) modified orbits, and (5) camera panning in x, y, and z directions.
I added (1) textures to all the planets, (2) a phong shader to the sun, rotation to the sun, and a point light coming from the sun to appropriately light the planets and fix the shadows on the sun, (3) stars using a particle emitter, (4) modified orbits, and (5) camera panning in x, y, and z directions.


|
(2) sun phong shading and point light effect are shown in the image below. Rotation is shown in the playblast to the right.
|
Source for sun phong shader:
https://www.highend3d.com/maya/downloads/shaders/c/sun-for-maya |
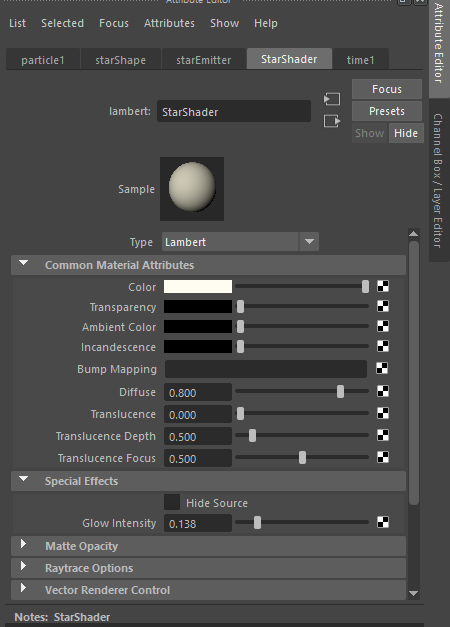
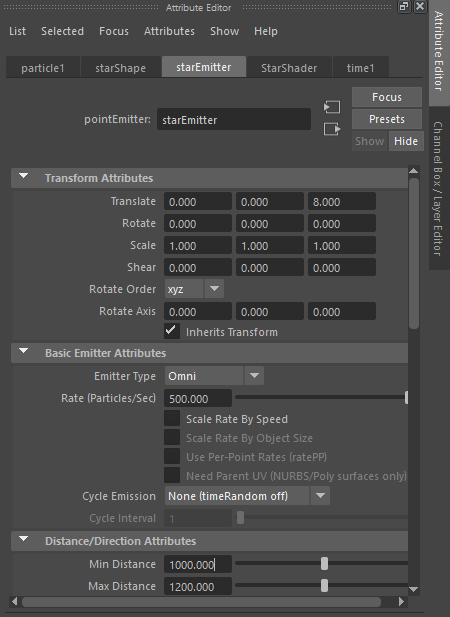
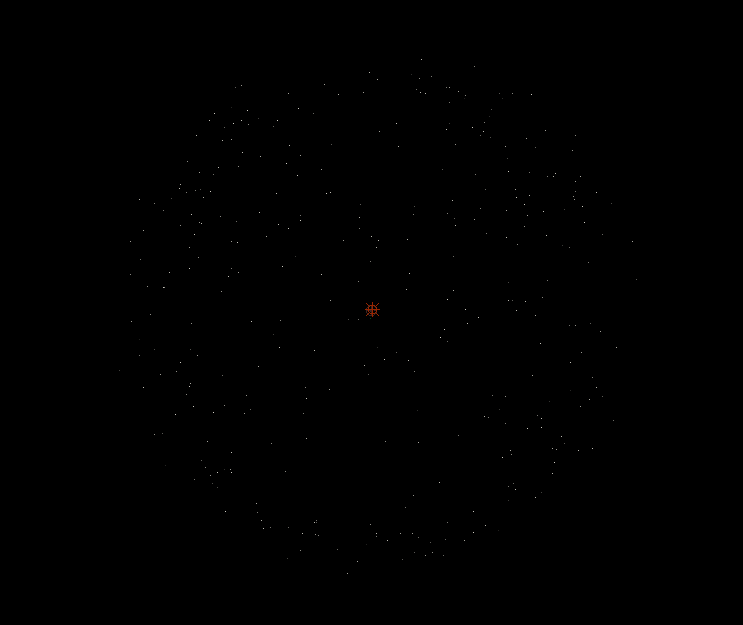
(3) stars made by particle emitter (settings and star shader shown below). The shader (left image) adds a glow to the stars and a slightly yellow tinge. I used an emitter so that I wouldn't have to individually place stars (settings in the right image). The bottom image below also shows the boundary of the stars-- it didn't make sense to produce stars outside of the frame, so I made the maximum distance 1200.
|
|
(4) modified orbits and (5) camera panning are best viewed in the final video, embedded below.
